
Painting, it seems so easy. You walk into a room and think, with just a lick of paint, this room will look amazing. And it does, but, well, what everyone seems to forget (or what they don't tell you) is that there's actually quite a bit of prep work involved. Like sanding down everything that is being painted so that the paint will stick to it. Taping off areas that you don't want paint on or that will be painted a different colour. The undercoat. Waiting. Hopefully no need for a second undercoat unless you're painting a purple pantry cupboard and door and so moving onto the first top coat. Waiting. Second top coat. Waiting. Taping off to apply first top coat to walls. Waiting... aaaaand, you get the point. It's not as easy or as quick OR as inexpensive to do as people nonchalantly talk about in casual conversation. And once you start, you can't stop until it's done. Otherwise it'll never get done.
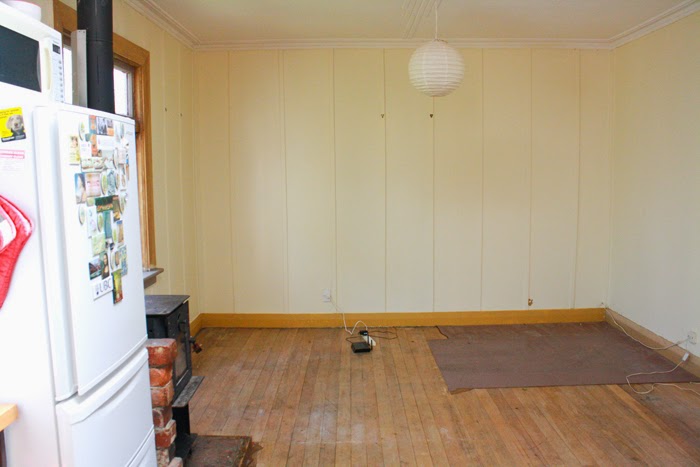
So, we moved everything out of the kitchen/dining room and.....GO! As always, some before shots once everything was removed...

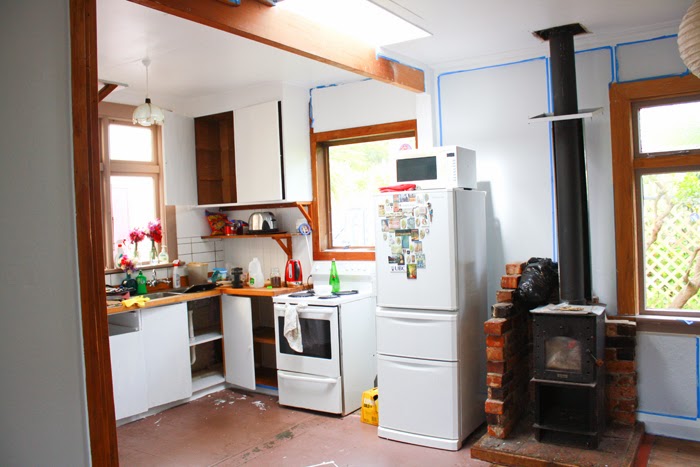
When they were tiling the bathroom, I was playing around with the tiles as a 'splash back' for the wall where the kitchen sink is and they pretty much fit perfectly. So they actually did those at the same time. It used to be a dark red colour - the sliver of colour you can see in the photo above between the door and the draw/cupboard. Already that area looks so much lighter! But, just wait until you see it painted and that awful cooked-liver-purple gone from the window frame.


The beautiful rimu flooring above I discovered when the builders were taking out the wall. The floor was actually covered by a thin hardboard which was then painted the cooked-liver-purple colour (the last of which you can see in the bottom left corner of the photo above). I started pulling up bits of board from the original doorway and would you believe it, beautiful wood! And it wasn't that hard to pull up either since it was just nailed down around the sides.
We pulled it all up (bar the corner one because we were planning on putting paint cans on it during the painting) and realised we could sand and varnish it and it would look beautiful (it does!). It was what we were planning on doing in the hall ways and bedrooms anyway, so that was that flooring issue solved.
The one was wasn't quite solved yet was the kitchen flooring...

Above you can see a square of cooked-liver-purple sticking out into the dining room. That was where the original kitchen range was (the skylight above was where the chimney would have been). This was removed long before we ever got the house, but the hole was then concreted in. The second issue was the fact that the original kitchen tiles had been stuck down directly onto the wood floor. So our luck with the ease of pulling up squares of hardboard was over.
There would be no beautiful wood flooring in the kitchen. We couldn't be bothered. So, while we had wanted to avoid getting flooring put on top of the wood, it was going to be the best option.
We wanted to avoid any faux wood next to real wood though so we are going with vinyl. It's not in yet (that happens tomorrow!!), but I can't wait for it to be done as that'll be almost one of the last finishing touches to that room. And, most importantly, there will officially be no more cooked-liver-purple in my life (except in some of the bedrooms. Why people? WHY???).


Well, let's get a white undercoat on shall we (after we've sanded down all surfaces of course, and taped off sections we don't want paint on etc...)
Phwoar! That looks much better already!


Don't worry, I did do the purple cupboard and the other kitchen cupboards.


The back of the door needed 2 undercoats (it only has one in the photo above) as did the purple cupboard and the panelled wall in the photo below.


I think at the stage in the photo above, all surfaces had had at least 1-2 undercoats. We then painted the ceiling, the kitchen walls, the cabinet sides, the skirting and the panels on the dining room walls with 2 coats of St Clair quarter - a white with the tiniest touch of grey in it. This is the trim colour we used on the bathroom ceiling/skirting and the lounge ceiling/skirting.
We had also undercoated both hall way sections when we had done the lounge and then finished them both off this time around entirely with St Clair Quarter, to keep them as light as possible.
Then we taped off the panelling in the lounge and put Aniwaniwa Half onto the walls, continuing the colour from the bathroom and lounge (these same colours have also been used in the bedrooms).


The walls had had two coats of Aniwaniwa Half at this stage and we had gotten up eagerly on the morning these were taken to pull off the tape. But not before photos of course :)


The first section of hallway finished in St Clair Quarter above. And below, peeling back the tape... how cool does it look?
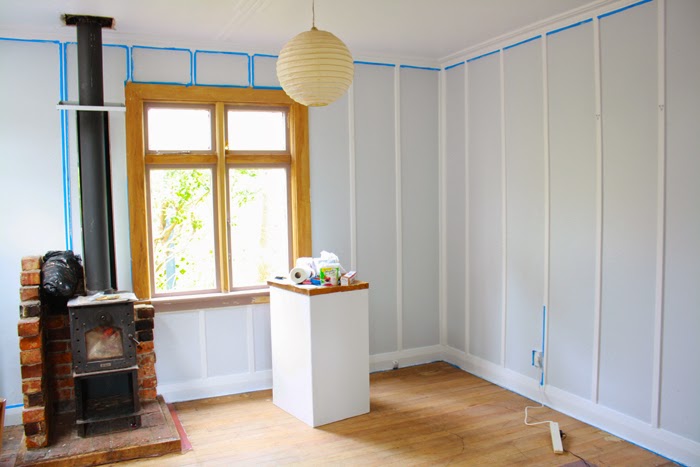

It was David's idea to do the panelling in the trim colour, and it's such a lovely feature I think. If we have panels, we may as well make them stand out a bit huh? Not everyone is lucky to have a feature like this but you could get the same effect with masking tape if it was something you really wanted (though if we had had just plain walls, I doubt we would have done it at all).
Next up, some beautifully sanded and varnished floors, but oh the dust...
xx
J