Saturday, January 24, 2015

Lounging About...

I really love our new lounge. While we've since needed to rearrange a bit (with an impending little person needing some accommodation) it's still such a nice room to eat breakfast in in the morning. To lounge about on the couch in the sunshine, to read a book or knit in with the french doors open, listening to the chooks have their conversations, the wafts of honeysuckle breezing in and a cat or two wandering past every now and then for a pat.

It wasn't always this way...


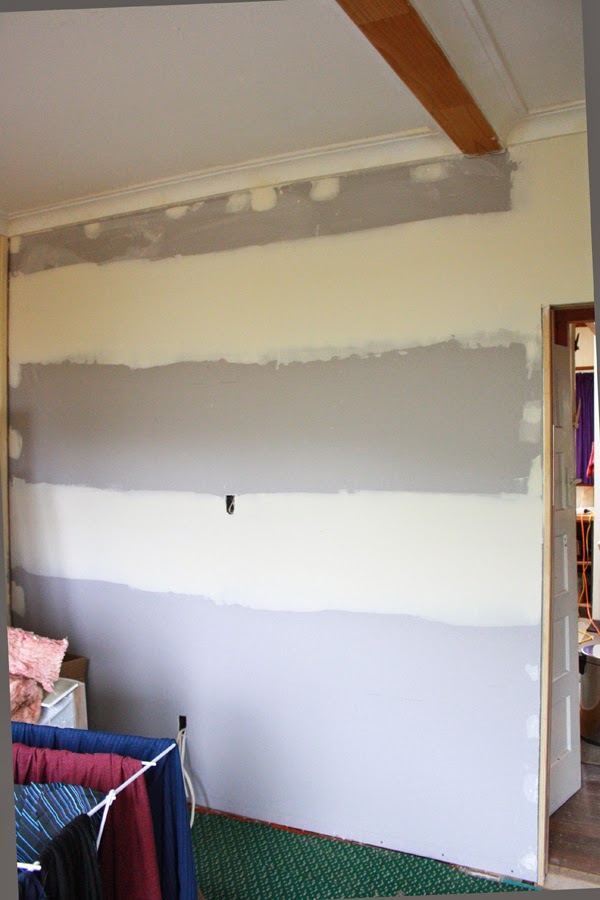
Initially we had thought that the far corner (where the wood panels are leaning in the photo above) was sinking slightly, as when you stood in that corner, it felt lower than the rest of the house. What had actually happened was when the room had been turned into one (a few owners ago) the wood beam flooring had somehow become strained and had started straining upwards in the middle of the room. So what we thought was the corner sinking, was actually us walking over a small hill and down into where the floors should properly sit.

So, the builders took out the middle section of floor, released the pressure (taking away the squeaks at the same time!!) and miraculously made the floor level again.

It was never hugely out of balance, but it's nice to have that fixed now. Also, since we were always going to carpet this room, they took a few floor boards to use to replace the two small spots of dry rot we found in the house after we moved in, to keep the same flooring throughout.


And then we stripped the window sills back to their former natural wood glory. (New lights were already in at this stage as you can see in the photo above).

They aren't by any means perfect though. Borer has had a party in them (as well as some more wooden flooring as we found out over Christmas when we were sanding!!) and previous owners have decided to try and bog up the borer holes and paint over them to make them go away. Ummm, borer needs to be rid of first guys, just sayin.

So, before we varnished the wood, throughout the whole house, we directly treated it and did a general bug bomb, then used proper wood putty to seal up the holes and then varnished. Again, the window sills don't look like they were made yesterday, but we actually kind of like them that way. It shows a bit more of the history of the house and since it's not a new house, I don't think these things should look perfect anyway.

Below is the room the morning before the carpet went down. Isn't it lovely? Don't worry, the rest of that old carpet went bye bye as well...

Dulux St Clair Quarter was used on the ceiling and trims and Aniwaniwa Half on the walls. We have that lovely little panelling detail in most corners of the rooms in the house and David thought it might be quite cool to leave them the trim colour as well - I couldn't agree more.


You can also see that we've not sanded back the wood around the french doors yet. They are a much darker wood anyway (they would have been reclaimed from elsewhere when this room was first remodelled) and while we will eventually, that hasn't happened yet. Luckily it's just a wood stain, rather than actual paint.


And the carpet goes in...


I cannot tell you how soft and squishy and lovely this room is to walk in now. My original idea was to go with a natural brown colour, to be a bit more in keeping with the wood flooring in the rest of the house, but we couldn't find the colour we wanted with the durability we wanted.

We bought this steely blue grey, short pile sample home with us, including a bunch of others, and really fell in love with the colour of it. Initially I was worried about the room maybe seeming too dark with a dark carpet, but the room is so light anyway, and the lighter colours in the carpet almost seem to reflect light back up. We also have rather colourful taste in the things we put into rooms, so we felt that it would actually be fine. And we love it!!


A sneaky peek at how the room looked with some furniture in it. I won't show you the full room since we're moving things around now and we've not put everything up on the walls yet, but it's such a lovely room that has had rather a huge transformation right? No more green racing carpet for a start...

xx
J

Sunday, January 18, 2015

Walls and Doors and Bits and Bobs...

A few (slightly boring but essential things) to bring you up to date before we continue.

Gib goes onto the new wall in the lounge...


Then it gets plastered, ready for paint...


Frame goes in for the single cavity slider in the hallway (so we can shut the top half of the house off from the bottom if we want to - great for keeping in wood burner heat during winter...).


Cavity slider goes in...


First section of hall way pinex boards come off so the builders can straighten the walls...


Hallway walls go back on - nice new smooth gib...


That photo. I love that photo. Talk about perfect timing.


End of hallway cavity slider is gibbed and plastered in...


Original coving is put back in and everything is plastered and smoothed, ready for paint...


xx
J (& D)

Saturday, January 10, 2015

A Changing Bathroom

Let's have a look at the bathroom shall we? The Electrician was in yesterday and put the new light in, now we just need to paint the window frame (black) and that'll be it! Bar a few homey decorations of course...


The tubs of water are to weigh the bath down, while the glue, or whatever it was, dried, to keep the bath firmly in place.

David was still away at this point, so I sent him the photo below and told him I had decided upon a Mediterranean decorating theme and was going with orange.

Don't worry, the bathroom is not orange! That orange coating is what they need to put on top of the aqua gib so that the tiles would stick to it (being a water-proof wall system, things being stuck to it, including paint, need a base layer to adhere too. Look at me all knowing what I'm talking about!! Not.)

Since the shower was near the window, we couldn't install a standard shower wall, and we wanted tiles anyway, so this was the beginning.


And now the tiles begin. White subway tiles with black grout will do rather nicely thank-you-very-much!!


A-MAZING! Look at how light the room looks now! Even with no light in there (we didn't have a light in there for a few days after we were able to use the room again. Peeing by candle light anyone...?).

We also chose a clear shower screen (in the photo above, but hard to see, perfect!) so that the room wouldn't be blocked of natural light from a curtain and it would still feel open. The bathroom is still a small room, even though we opened it up a bit, and having a shower curtain would have ruined the feeling of space we managed to get with the new layout.


Oh em GEE, would you look at that floor. SWOON. No amount of exclamation marks can show you how much I love that floor.

And honestly, who would have ever thought I'd swoon over floor tiles or taps for that matter. As a long time watcher of home renovation shows, I honestly never 'got' the obsession with taps. I mean, it's a TAP!

Well, you can count me officially converted. I get it. I totally get it.


Once the tiles were in (David was back at this stage) David painted on an undercoat of smelly painty stuff (see above: aqua gib needs stuff put on it so other things will stick to it) and then a proper white under coat and then we got the real stuff on.

We went for Dulux Colours of NZ  - St Clair Quarter for the trim/ceiling colour, it looks white when you look at it, but it's ever so slightly grey in tinge, and Aniwaniwa half on the walls.

We liked the colours so much we continued them on into the lounge and then decided to use them for the whole house. The hall ways are painted all in St Clair Quarter though to try and keep them as light as possible.


Just a sneaky wee taster of the nearly finished bathroom - that's the old light you can see in the photo above. I'm going to do a proper 'compare & contrast' post so we can see the old vs the new (mostly because I find it hard to remember sometimes too, I'm so used to it being nice now. But, you can refresh your memory here if you feel so inclined).

xx
J (& D)

Tuesday, January 06, 2015

In Hot Water (or out of it, depending on how you want to look at it...)

Happy New Year everyone!!!

I have to admit, I'm really excited to try and get you up to date with the renovation. Christmas and New Years saw us finally get back into the house side of things (rather than the garden) and we've been sanding and painting and varnishing, trying to get as much done before David had to head back to work on January 5th.

We realised that we really needed to get it done now, or we'd never have the big block of time to spend on it before the end of May, when we're expecting our first child.

Yup, I'm pregnant! And honestly, there isn't much else I can think of as a better deadline than an impending baby!

I'm really glad we have finally started back as well, since there is absolutely no way I'd want to do any of this with a baby. We're currently right back to where we started in June when the major things were being done - dust and stuff everywhere!! We're currently sleeping in the lounge at the moment since we decided to sand/varnish the floors in the new baby's room (our old room) and our new bedroom (what was the office). And then we decided that since everything is out, we may as well paint too...

Anyway, today's little topic - hot water cylinders. Or lack there of.

I think I've mentioned before that unexpected things pop up all the time. The leaky, old hot water cylinder was one of them. Below is our little kitchen in it's original state (taken on a cold Dunedin winter morning before the builders arrived...). The hot -water cylinder box-cupboard-thing is to the right, with the clock on it. If you want to remind yourselves of how the rest of the space looked originally, you can do so here.


You see, the first thing is that we have a small kitchen. I do really like our kitchen, but it is small and the hot water cylinder was in a random and rather inconvenient spot. It was covered by a box that looks like it could have useful storage space in it (see: little cupboard doors) but actually, there was no way you'd want to store anything in them. It was kinda gross and dusty in there. I think they were more 'service' holes (for all that servicing that went on...?) than anything else.

One day, when I was sitting in our 'office' working away and minding my own business, there was a knock at the door - it was the plumber who was there doing some work on the bathroom.

Plumber - "Hi. Um, I have some bad news for you"
Me - "Oh....?" *dread creeps over  - can he not do the bathroom anymore for some reason???*
Plumber - "Yeah, your hot water cylinder is leaking. Not heaps, but, it's dripping. It's a really old one too, so while I can fix it, it'll get worse over time and you'll need to replace it"
Me - "Oh..."

After further conversations, it was clear that we may as well do the work that needed doing now (while everyone we needed was there) and that the plumber thought going for gas hot water was the best option. I knew that I wanted to move the cylinder from where it was - it was annoying and took up much needed space. But it would cost the same amount to move it elsewhere as it would to convert to gas and I had no idea where we would move it to in the first place.

David was still away but I managed to catch him on skype and we agreed to go for gas. No more space-hogging cylinder and we'd get good water pressure (goodbye old header tank!) and we'd save money on electricity since we wouldn't be constantly heating hot water.


You can see what I mean about non-useful storage, now that the front of the cupboard is gone. The pipe going up into the roof was the wetback pipe.


As the builders were taking the cupboard down, it became apparent that the visible beam that runs along the ceiling, wasn't actually sitting in the wall. It was about 2cm out. So, the cupboard had been supporting the beam, rather than the wall. Erm... don't worry, the house wasn't going to fall down and the builders put in a new supporting beam against the wall (which you can see below - looks like pink wood) and everything was fine again.


After that, the electrician came and put the plugs that were in the side of the cupboard into the kitchen wall as well as adding two extra at my request (this house is annoyingly lacking in power plugs. We're going to get another double set put in as well on Friday, since our oven has pretty much died, taking with it two power plugs. But never fear, we bought a new one in the boxing day sales and I cannot wait to get baking in it!! An oven with the right temperature?? I'll take it. But alas, yet another example of unexpected things popping up...).

The builders had done a great job of saving as much of the original coving as they could, but they had no more left to finish off the bit where the cylinder cupboard had been. I told them to leave it for the time being while we tried to figure out what to do. And then the plasterer arrived...

His name is Andrew and he looked at the missing coving and said "Do you want me to something about that?".
Me - "Ummm, yes? The builders have no more coving left so we're trying to decide what to do"
Andrew - "I can make something for you. It might not be perfect but it'll be okay"
Me - "Yes please!"

Half an hour later I came back to the below...
Me - "Oh wow! That looks great!"
Andrew - "It's not perfect..."
Me - "Looks pretty perfect to me"

Now that it's all been painted, you'd honestly never know it was any different. Turns out Andrew has done a lot of work on some of the older buildings in Dunedin doing restoration plastering, including replicating some of the very intricate coving the buildings had. Can't get much better than that now can you?


The fridge is now in that space (rather than sticking out into the kitchen space when you walk in) which makes the room seem much more open than it did originally.

xx
J (&D)